I’ve already made a few tutorials related to the Juneo Supernet, and after spending months digging around the Juneo Network, it still amazes me. No matter what, the innovation behind Juneo is truly impressive. Just imagine — you can deploy your own network with just a few simple steps, and it only costs you 0.1 $JUNE. Pretty awesome!
For today’s guide, as you’ve already read in the title, I’ll walk you through how to develop your own smart contract using Hardhat. I’ve already written a tutorial on how to do this using Remix, which you can find Here, or if you’re interested in deploying your own DEX (Uniswap V3) on Juneo, you can find that guide Here.
Now, What is Hardhat?
Hardhat is a dev environment for Ethereum smart contracts that enables compiling, deploying, testing, and debugging. It has local testing, Solidity compilation, and easy contract deployment.
Then, Why Use Hardhat?
Hardhat is one of the most powerful Ethereum development environments, known for:
Built-in debugging: Catch mistakes in your smart contracts and get helpful error messages.
Fast iteration: Deploy, test, and redeploy quickly.
Network configuration: Easily connect to multiple Ethereum-compatible networks, including Juneo Supernet.
Wide tool support: Seamlessly integrates with ethers.js, Solidity, Waffle, and other libraries.
Customizable scripting: Create complex scripts for deployment and interaction with contracts.
By combining Hardhat’s features with the Juneo Supernet’s scalability and security, developers can easily build and deploy dApps.
Prerequisites
Before you begin, ensure that you have Node.js v18 or above and npm installed on your machine.
Note: I’m using Linux and Visual Studio Code as my dev environtment
Step 1: Installing Hardhat
Let’s start by installing hardhat on your local machine. Open your Visual Studio Code, open your terminal by pressing ctrl+shift+` and run below command:
npm install --save-dev hardhatAfter that you need to initialize Hardhat by running:
npx hardhat initYou’ll asked a few question, it depends on what you need but for this tutorial you can answer the question like this:
✔ What do you want to do? · Create a JavaScript project
✔ Hardhat project root: · (directory of your project)
✔ Do you want to add a .gitignore? (Y/n) · y
✔ Do you want to install this sample project's dependencies with npm (@nomicfoundation/hardhat-toolbox)? (Y/n) · y
Basically you can just press Enter and Enter and Enter, lol. Now you need to wait until installation completed.
Step 2: Configure Hardhat for Juneo Supernet
Now, let’s configure Hardhat to connect to the Juneo Supernet. But before that, for best practices in handling sensitive data we need to install dotenv.
npm install dotenvThe dotenv package is a great way to keep passwords, API keys, and other sensitive data out of your code. It allows you to create environment variables in a . env file instead of putting them in your code.
After that you need to create a .env file in your project root and store your private key as follows:
PRIVATE_KEY=your_private_key_hereOpen the hardhat.config.js delete everything and paste below configuration:
require("@nomicfoundation/hardhat-toolbox");
require("dotenv").config();


/** @type import('hardhat/config').HardhatUserConfig */
module.exports = {
  solidity: "0.8.24",
  networks: {
    juneoSocotra: {
      url: "https://rpc.socotra-testnet.network/ext/bc/JUNE/rpc",
      chainId:  101003,
      accounts: [`0x${process.env.PRIVATE_KEY}`], // Use your wallet's private key here
    },
    juneoMainnet: {
      url: "https://rpc.juneo-mainnet.network/ext/bc/JUNE/rpc",
      chainId:  45003,
      accounts: [`0x${process.env.PRIVATE_KEY}`], // Use your wallet's private key here
    },
  },
};
I add configuration for Juneo Socotra Testnet and Juneo Mainnet. You can change it depend on your target chain. You just need to change RPC url and chainID.
Step 3: Writing a Simple Smart Contract
Now, let’s create a simple Solidity smart contract. In the contracts/ directory, create a new file called Storage.sol and add the following:
// SPDX-License-Identifier: MIT
pragma solidity ^0.8.4;

contract Storage {
    uint256 private value;

    // Store a new value
    function set(uint256 _value) public {
        value = _value;
    }

    // Retrieve the stored value
    function get() public view returns (uint256) {
        return value;
    }
}
This contract has two functions: set to store a value and get to retrieve it.
Step 4: Deploying the Contract
Before deploying the contract, make sure you have some JUNE tokens in your wallet for gas fees. Then, compile the contract by running:
npx hardhat compileNext, let’s write the deployment script. In the scripts/ folder, create a new file called deploy.js:
async function main() {
  const SimpleStorage = await ethers.getContractFactory("Storage");
  const storage = await SimpleStorage.deploy();

  console.log("Storage contract deployed to:", storage.address);
}

main()
  .then(() => process.exit(0))
  .catch(error => {
    console.error(error);
    process.exit(1);
  });
Now, deploy the contract on the Juneo Supernet using Hardhat, I’ll deploy it on Socotra Testnet:
npx hardhat run scripts/deploy.js --network juneoSocotraFor Juneo Mainnet you can run:
npx hardhat run scripts/deploy.js --network juneoMainnet
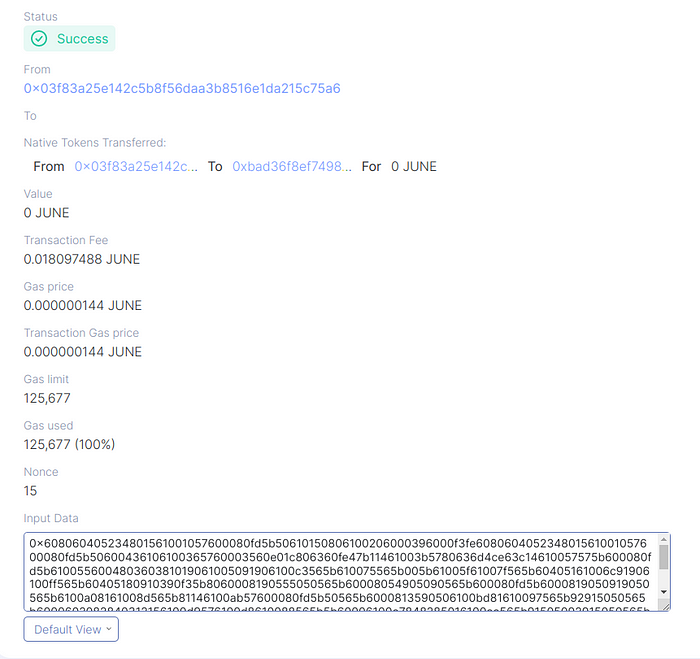
You can check your transaction on MCNScan
If everything goes well, you’ll see the address of your deployed contract in the terminal. You can find the Storage contract that i managed to deploy on Socotra Testnet Here. You can interact directly using Hardhat or build interface for it. But we’ll talk about it on the next tutorial…


